Exercise 4: The gamepad
Please complete Exercise 3 first, since the steps below build upon your work from that project.
In Exercise 3, we created a THINK() function that moves a red ball to the right by adding to its .X variable. Now we will learn how to read from the virtual gamepad input device, to allow you to move the red ball directly.
A "virtual" gamepad
-
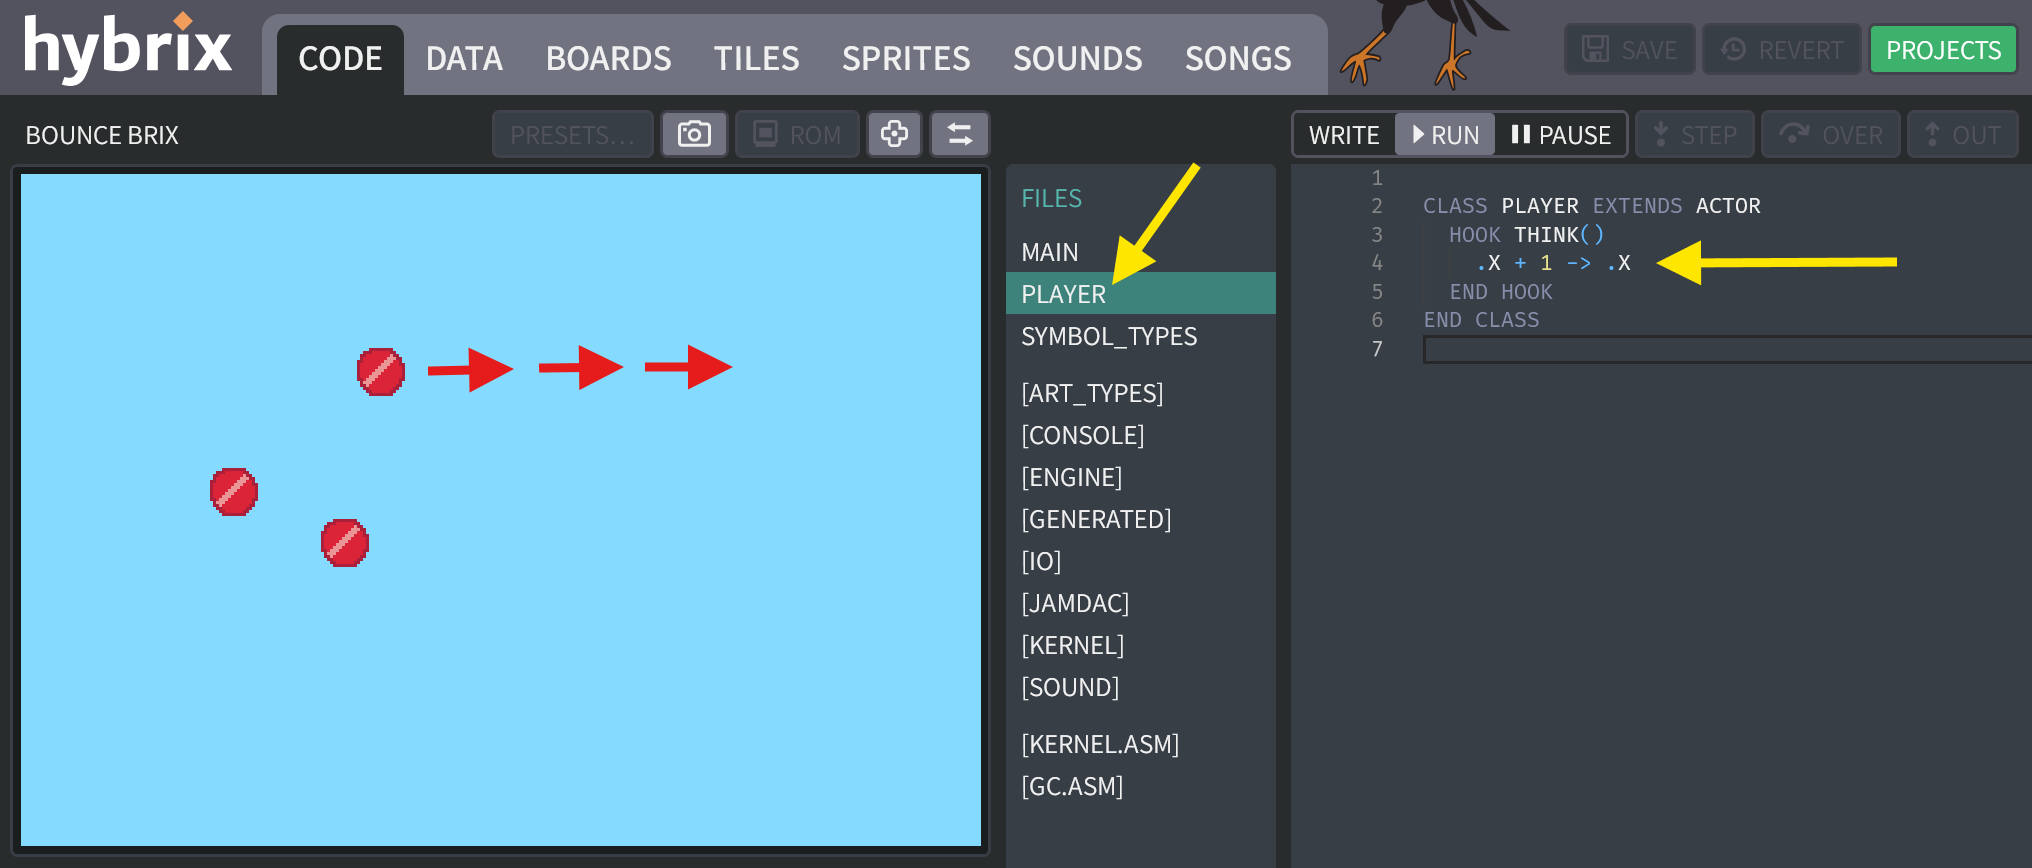
Open your project called "BOUNCE BRIX" that you saved from Exercise 3. On the CODE screen, find the file called "PLAYER" which should contain code like this:
CLASS PLAYER EXTENDS ACTOR
  HOOK THINK()
    .X + 1 -> .X
  END HOOK
END CLASS
(The body of your
THINK()function might be a bit different, since we were experimenting with ways to change.Xand.Y.) -
Change the code to add an
IFstatement, like this:CLASS PLAYER EXTENDS ACTOR
HOOK THINK()
IF GAMEPAD::RIGHT THEN
.X + 1 -> .X
END IF
END HOOK
END CLASSThis code means: "IF the gamepad is pressed to the right, THEN add 1 to X." In other words, the ball will not move unless you press to the right.

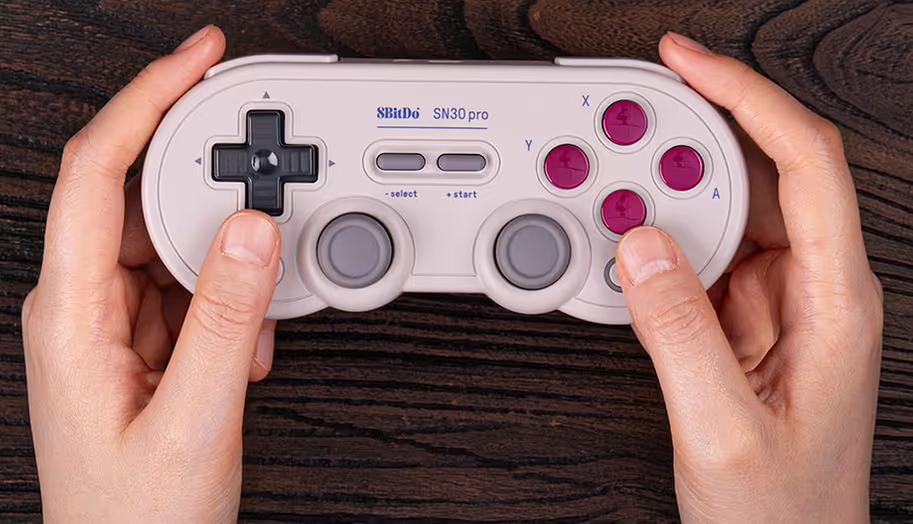
What is a gamepad?
A gamepad is a handheld controller, commonly used with video game systems like Xbox or Playstation. Here's an example:
If you have a gamepad device that connects to your computer, the Hybrix website can use it directly. If not, no problem. Hybrix can use your computer's keyboard to simulate a "virtual" gamepad.
For technical details, see the Gamepads hardware documentation.
-
This exercise does not require a gamepad. Instead, we will simulate a "virtual" gamepad using your keyboard.
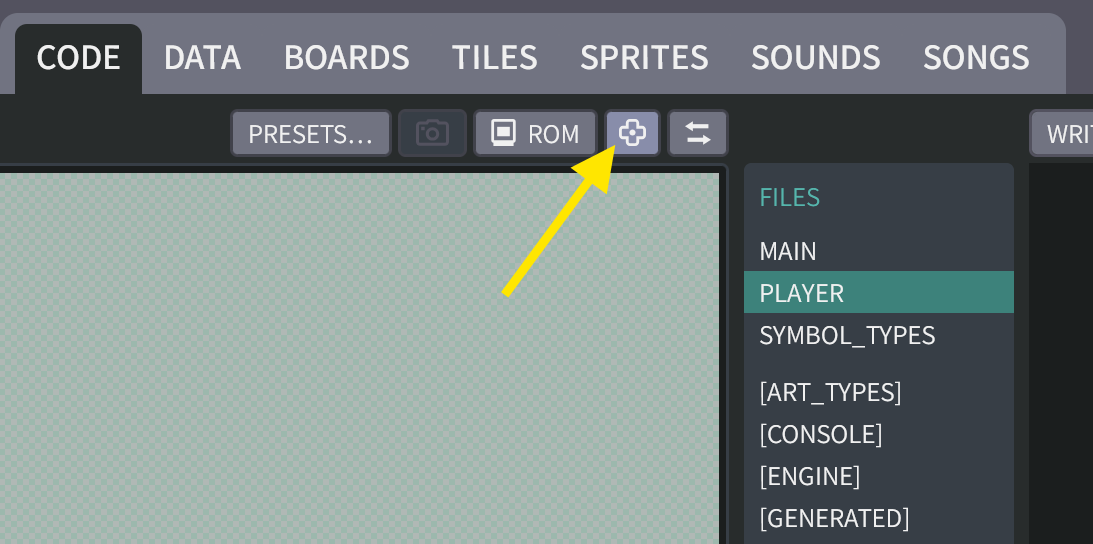
To set up your gamepad configuration, click this button to open the "CONFIGURE CONTROLLERS" window:
Mark the checkbox for "DEVICE 0" and choose "KEYSET A". Clear the checkbox for "DEVICE 1." The result should appear as shown below:

-
While this window is open, you can test the virtual controller. On your keyboard, try pressing
SHIFT,Z,X. You should see the virtual gamepad buttons light up for button A, B, and C.On your keyboard, try pressing the arrow keys (
UP,DOWN,LEFT,RIGHT). You should see the X and Y axes change to-1024and1024.When you are finished, click the "DONE" button to close this window.
Control the ball!
-
At the top of the CODE screen, click the "RUN" button to run your program.
What happens? The ball does not move. But if you press the
RIGHTarrow key on your keyboard, then the ball now moves to the right! -
Let's finish the logic for the other directions. Can you make the ball move left when the
LEFTarrow key is pressed?(Click to see the answer)
The "PLAYER" file:
CLASS PLAYER EXTENDS ACTOR
  HOOK THINK()
    IF GAMEPAD::LEFT THEN
      .X - 1 -> .X
    END IF

    IF GAMEPAD::RIGHT THEN
      .X + 1 -> .X
    END IF
  END HOOK
END CLASS -
Now let's make the ball move up when the
UParrow key is pressed.(Click to see the answer)
The "PLAYER" file:
CLASS PLAYER EXTENDS ACTOR
  HOOK THINK()
    IF GAMEPAD::LEFT THEN
      .X - 1 -> .X
    END IF

    IF GAMEPAD::RIGHT THEN
      .X + 1 -> .X
    END IF

    IF GAMEPAD::UP THEN
      .Y - 1 -> .Y
    END IF
  END HOOK
END CLASS -
And finally, let's move down when the
DOWNarrow key is pressed. With this change, you should be able to move the ball anywhere the screen!(Click to see the answer)
The "PLAYER" file:
CLASS PLAYER EXTENDS ACTOR
  HOOK THINK()
    IF GAMEPAD::LEFT THEN
      .X - 1 -> .X
    END IF

    IF GAMEPAD::RIGHT THEN
      .X + 1 -> .X
    END IF

    IF GAMEPAD::UP THEN
      .Y - 1 -> .Y
    END IF

    IF GAMEPAD::DOWN THEN
      .Y + 1 -> .Y
    END IF
  END HOOK
END CLASS
"IF" versus "ELSIF"
Notice that you can also press both
LEFTandUParrow keys together, and the ball will move northwest (diagonally). If you pressUPandRIGHTtogether, the ball moves northeast. This works because we wrote the code as a series ofIFconditions. Each condition gets a chance to move the ball.What if, for some reason, we wanted to prevent diagonal movement? We could solve this by changing the logic to use ELSIF:
(Click to see the code)
The "PLAYER" file:
CLASS PLAYER EXTENDS ACTOR
  HOOK THINK()
    IF GAMEPAD::LEFT THEN
      .X - 1 -> .X
    ELSIF GAMEPAD::RIGHT THEN
      .X + 1 -> .X
    ELSIF GAMEPAD::UP THEN
      .Y - 1 -> .Y
    ELSIF GAMEPAD::DOWN THEN
      .Y + 1 -> .Y
    END IF
  END HOOK
END CLASS
Now the first successful
IFcondition will run, and all the others will be skipped. And now the order becomes important: If you pressLEFTandUPtogether, the left direction wins, because it gets checked first. -
Before moving on, let's add one more condition, just for fun:
# PRESS "SHIFT" KEY TO TELEPORT!
# (THE VIRTUAL GAMEPAD USES "SHIFT" FOR BUTTON "A".)
IF GAMEPAD::BUTTON_A THEN
  10 -> .X
  10 -> .Y
END IF
What do you think this will do?
(Click to see the full code)
The "PLAYER" file:
CLASS PLAYER EXTENDS ACTOR
  HOOK THINK()
    IF GAMEPAD::LEFT THEN
      .X - 1 -> .X
    END IF

    IF GAMEPAD::RIGHT THEN
      .X + 1 -> .X
    END IF

    IF GAMEPAD::UP THEN
      .Y - 1 -> .Y
    END IF

    IF GAMEPAD::DOWN THEN
      .Y + 1 -> .Y
    END IF

    # PRESS "SHIFT" KEY TO TELEPORT!
    # (THE VIRTUAL GAMEPAD USES "SHIFT" FOR BUTTON "A".)
    IF GAMEPAD::BUTTON_A THEN
      10 -> .X
      10 -> .Y
    END IF
  END HOOK
END CLASS
Adding velocity
-
In real life, a ball has inertia which causes a velocity—given a push, the ball will keep rolling on its own. How can we add that feature? The ball needs to "remember" its velocity after you push it. We can add some member variables to remember the velocity. We'll call our variables
DXandDY. They will represent the amount that gets added toXorYeach time thatTHINK()is called.Why did we name it DX?
The variable name
DXis short for "delta X". Mathematicians often use the Greek letter to measure small steps of change. The letter is called "delta," which starts with a "D". Variable names likeDXandDYare commonly used in the video games industry.Try replacing your "PLAYER" file with this code:
CLASS PLAYER EXTENDS ACTOR
  # REMEMBER THE BALL'S VELOCITY
  VAR DX
  VAR DY

  HOOK THINK()
    IF GAMEPAD::LEFT THEN
      -1 -> .DX
    END IF

    IF GAMEPAD::RIGHT THEN
      1 -> .DX
    END IF

    # ADD THE BALL'S VELOCITY, MOVING THE BALL BY ONE STEP
    .X + .DX -> .X
    .Y + .DY -> .Y
  END HOOK
END CLASSDXandDYstart out as 0, so.X + .DX -> .Xis simply adding zero each time, and nothing happens. When you press theRIGHTarrow key,1 -> .DXputs 1 intoDX, so nowXincrease by one each time. Even if you let go of the key, the ball keeps drifting in that direction! PressingLEFTcauses it to drift in the other direction.(What about
UPandDOWN? To keep things simple, for now let's only worry about left/right movement. We'll bring back up/down movement in step 13.) -
We can make this effect more dramatic by using
LEFTandRIGHTkeys to increase and decrease the velocity, rather than merely putting or intoDX.Try this version:
CLASS PLAYER EXTENDS ACTOR
  # REMEMBER THE BALL'S VELOCITY
  VAR DX
  VAR DY

  HOOK THINK()
    IF GAMEPAD::LEFT THEN
      .DX - 1 -> .DX
    END IF

    IF GAMEPAD::RIGHT THEN
      .DX + 1 -> .DX
    END IF

    # ADD THE BALL'S VELOCITY, MOVING THE BALL BY ONE STEP
    .X + .DX -> .X
    .Y + .DY -> .Y
  END HOOK
END CLASS
Wow! The ball speeds up quickly! It may fly off the side of your screen.
-
Let's add a limit to prevent the
DXvelocity from becoming too extreme. We can use ourIFcondition to limitDX, so that it stays between and .CLASS PLAYER EXTENDS ACTOR
# REMEMBER THE BALL'S VELOCITY
VAR DX
VAR DY
HOOK THINK()
IF GAMEPAD::LEFT AND .DX >= -2 THEN
.DX - 1 -> .DX
END IF
IF GAMEPAD::RIGHT AND .DX <= 2 THEN
.DX + 1 -> .DX
END IF
# ADD THE BALL'S VELOCITY, MOVING THE BALL BY ONE STEP
.X + .DX -> .X
.Y + .DY -> .Y
END HOOK
END CLASSFeel free to try a larger limit if you want your ball to move faster.
-
So far we've been focusing on left/right movement. Can you figure out the logic for the
UParrow key?(Click to see the answer)
The "PLAYER" file:
CLASS PLAYER EXTENDS ACTOR
  # REMEMBER THE BALL'S VELOCITY
  VAR DX
  VAR DY

  HOOK THINK()
    IF GAMEPAD::LEFT AND .DX >= -2 THEN
      .DX - 1 -> .DX
    END IF
    IF GAMEPAD::RIGHT AND .DX <= 2 THEN
      .DX + 1 -> .DX
    END IF
    IF GAMEPAD::UP AND .DY >= -2 THEN
      .DY - 1 -> .DY
    END IF

    # ADD THE BALL'S VELOCITY, MOVING THE BALL BY ONE STEP
    .X + .DX -> .X
    .Y + .DY -> .Y
  END HOOK
END CLASS -
Can you figure out the logic for the
DOWNarrow key? With this fix, we can move fast and slow, in every direction.(Click to see the completed Exercise 4)
The "PLAYER" file:
CLASS PLAYER EXTENDS ACTOR
  # REMEMBER THE BALL'S VELOCITY
  VAR DX
  VAR DY

  HOOK THINK()
    IF GAMEPAD::LEFT AND .DX >= -2 THEN
      .DX - 1 -> .DX
    END IF
    IF GAMEPAD::RIGHT AND .DX <= 2 THEN
      .DX + 1 -> .DX
    END IF
    IF GAMEPAD::UP AND .DY >= -2 THEN
      .DY - 1 -> .DY
    END IF
    IF GAMEPAD::DOWN AND .DY <= 2 THEN
      .DY + 1 -> .DY
    END IF

    # ADD THE BALL'S VELOCITY, MOVING THE BALL BY ONE STEP
    .X + .DX -> .X
    .Y + .DY -> .Y
  END HOOK
END CLASS
Don't forget to click the "SAVE" button to save your work. We'll need it for the next exercise.
Great job! That's all for Exercise 4. In the next exercise, we'll make a world for your rolling ball to explore.