Exercise 2: Symbols and Actors
Please complete Exercise 1 first, since the steps below build upon your work from that project.
In the previous exercise, we created a sprite that is an animated red ball. Now we will use this artwork to build a computer program that you can run.
Placing actors
-
Open your project called "BOUNCE BRIX" that you saved from Exercise 1. On the SPRITES tab, you should see the red ball:

-
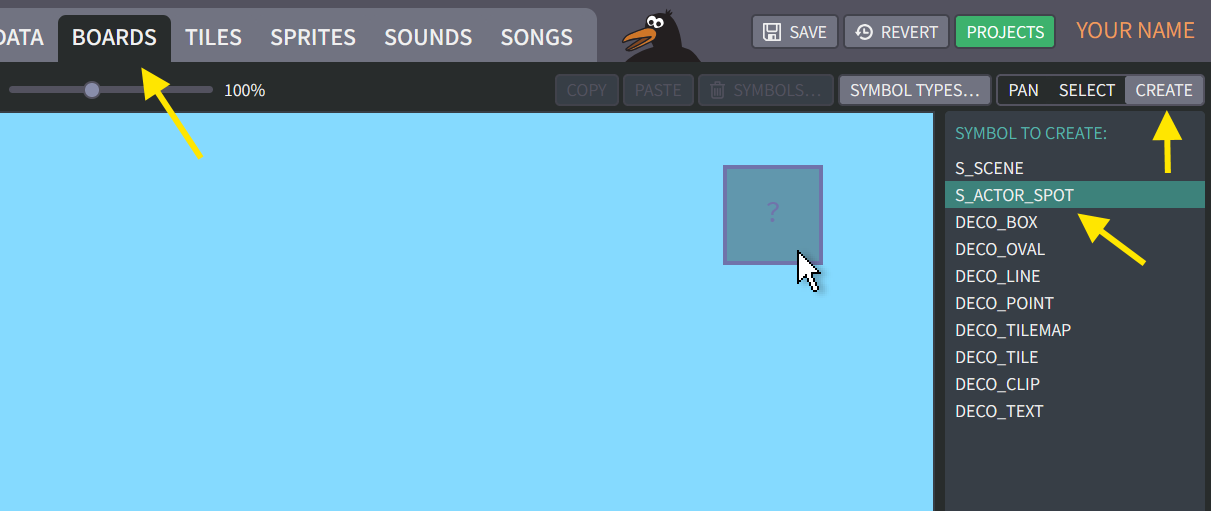
Click on the BOARDS tab. Click the "CREATE" button, then choose "S_ACTOR_SPOT".
-
When you move your mouse over the board, a ghosted "?" box will appear. Clicking your mouse will create the "S_ACTOR_SPOT" symbol, which will now appear as a solid box. You can move it around by clicking and dragging:

-
Click and drag to move the "?" box to the upper left corner of the board, as shown above. Then find "FIGURE CLIP" on the right panel, and click the "CHANGE…" button. In the pop-up window, choose your red ball.
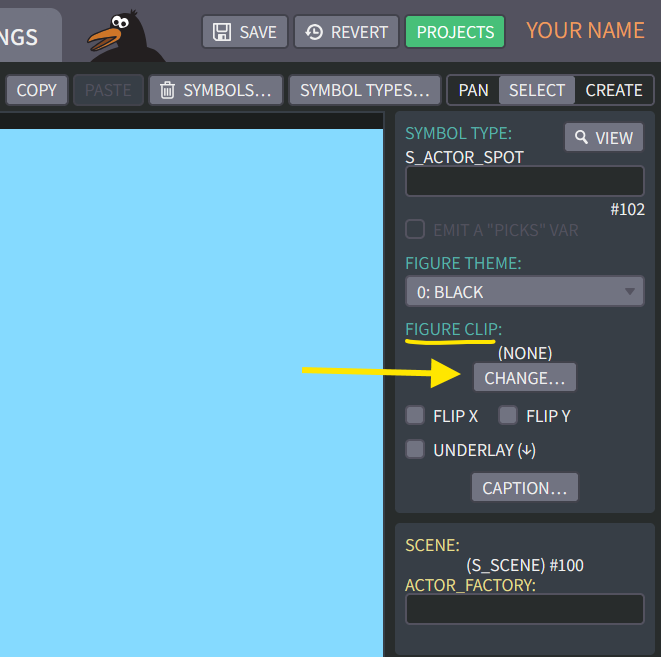
The "?" box should now be replaced with the animation clip showing your red ball sprite:


What is it?
In Exercise 1, we created a sprite, which is a collection of artwork. A sprite is made from pixel images called animation frames. Our red ball has four animation frames, which get played in sequence to make the ball roll. The rolling sequence is called an animation clip. Later we might add more clips to our sprite, for example animations where the ball squashes or explodes.
Here in Exercise 2, we will create a Hybrix actor. An "actor" is a computer program object that moves around on the screen and "thinks". Our actor will appear as the rolling ball. If we wanted to have ten different balls bouncing around on the screen, that would be ten actors showing the same sprite clip.
Actors only exist in your program, though. On the drawing board, the thing we created is actually a symbol called "S_ACTOR_SPOT". This symbol is like a placeholder that tells the program to create an actor at that location ("spot") whenever this scene gets loaded.
Running your program
-
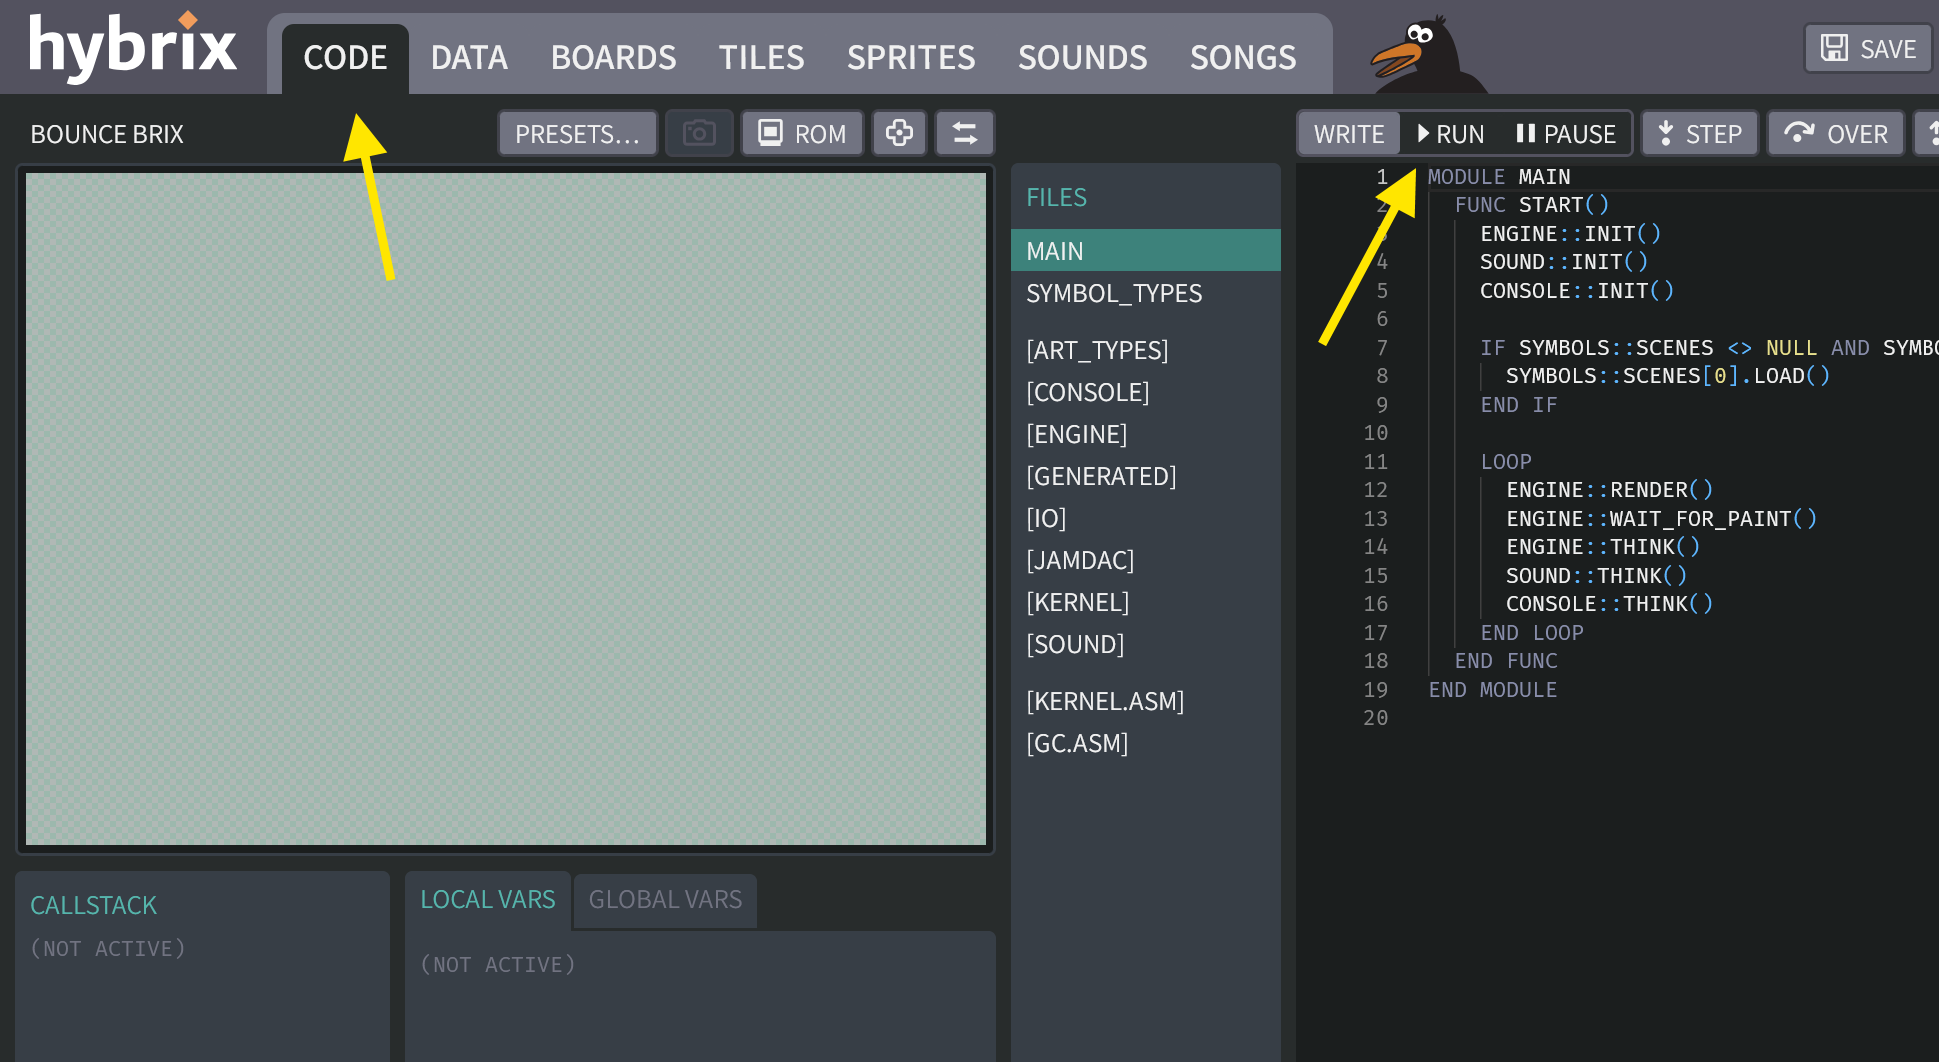
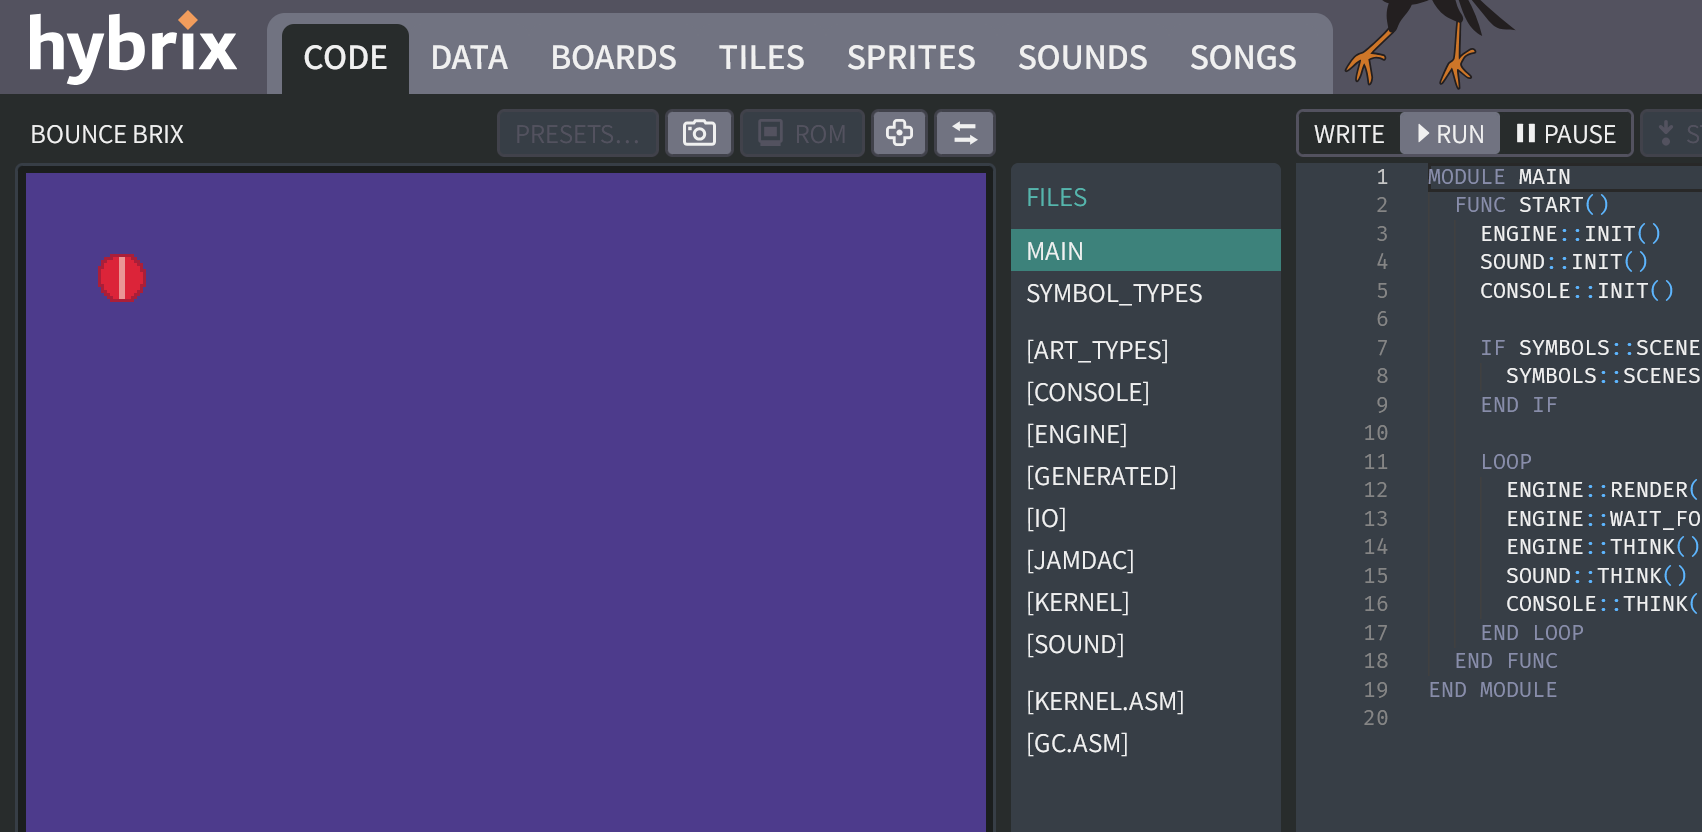
Now let's try building and running your program. Click on the CODE tab at the top of your screen. Then click the "RUN" button. You should see your red ball animating:
If you have problems:
- If you can't see the ball, maybe it is outside the window: Go back to the BOARDS screen and make sure your red ball is positioned in the upper-left corner of the blue rectangle, as shown in Step 4.
- If your mouse gets stuck in the window, press the
ESCkey to get it back.
-
Next, click the "WRITE" button. This stops your program. While working on your program, you will frequently switch back and forth between "write" mode (where you make changes) and "run" mode (where you test your changes to see if the program runs correctly).
How does the "RUN" button build my program?
Whenever you click the "RUN" button, the Hybrix website builds your program using a tool called a compiler. What goes into the compiler are all the materials that you will be creating: your code, sprites, board symbols, songs, and sound effects. From these "inputs," the compiler produces a computer program binary file. A binary file is like a giant list of little numbers called bytes. One program file might have hundreds of thousands of bytes. When making programs, people don't usually work directly with bytes, but one day you'll be able to understand the meaning of every byte in your program. For example, each pixel in your sprite becomes a byte whose number represents a color from the drawing palette.
Where is the binary file? For now, you can't see it. The Hybrix website runs your program using a virtual machine. It is a simulated computer, with a simplified architecture that is better for teaching coding concepts. The binary file gets loaded into the memory of this virtual machine. The machine runs your program, one byte at a time.
-
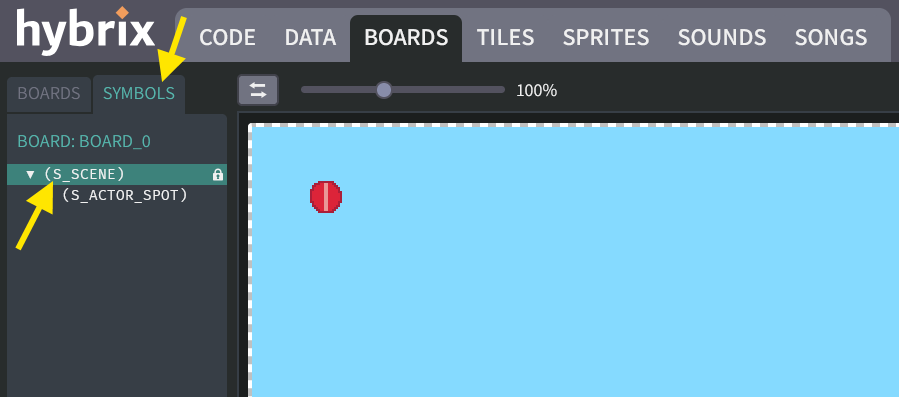
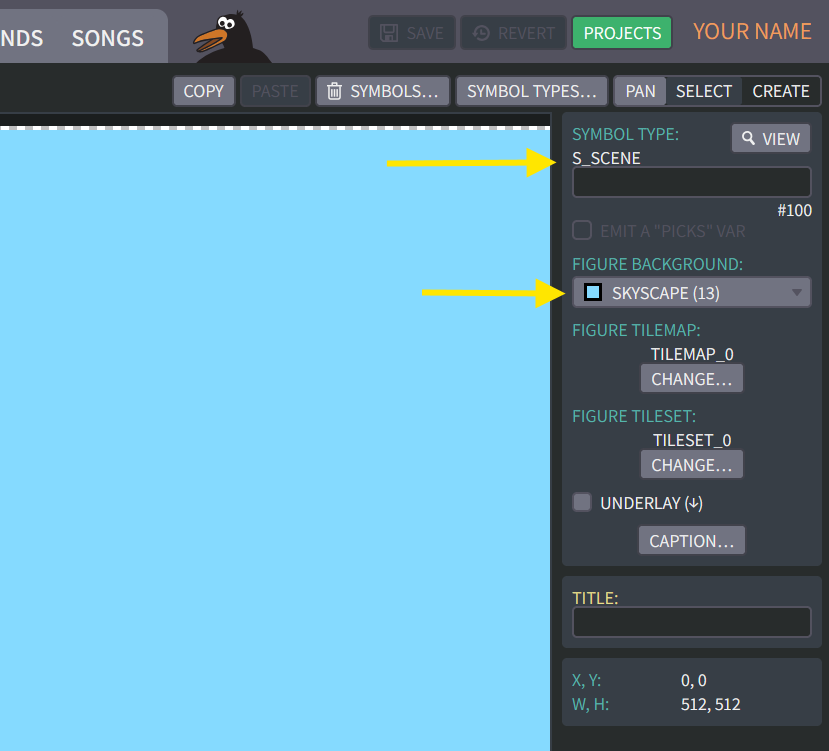
Go back to the BOARDS tab, and click the SYMBOLS tab. Then try clicking "(S_SCENE)". The blue rectangle should get selected, showing a dashed line around its border:
-
A Hybrix board is like a drawing board. On the BOARDS tab you can create multiple boards, but you can only select and view one board at a time. Clicking the SYMBOLS tab shows the symbols that are on the currently selected board. When you click on a symbol to select it, the dashed line will appear around its figure. Also, you will see its symbol properties on the right side of your screen.
Below, we see the properties for "(S_SCENE)":
-
Try changing the figure background to color from #13 (skyscape) to #30 (merlin). If you go to the CODE tab, then click "RUN" again, the background should now have a purple color instead of light blue:
-
Go back to the BOARDS tab, click on "(S_SCENE)" again, and change its figure background color to be #13 (skyscape) again.
Three red balls
-
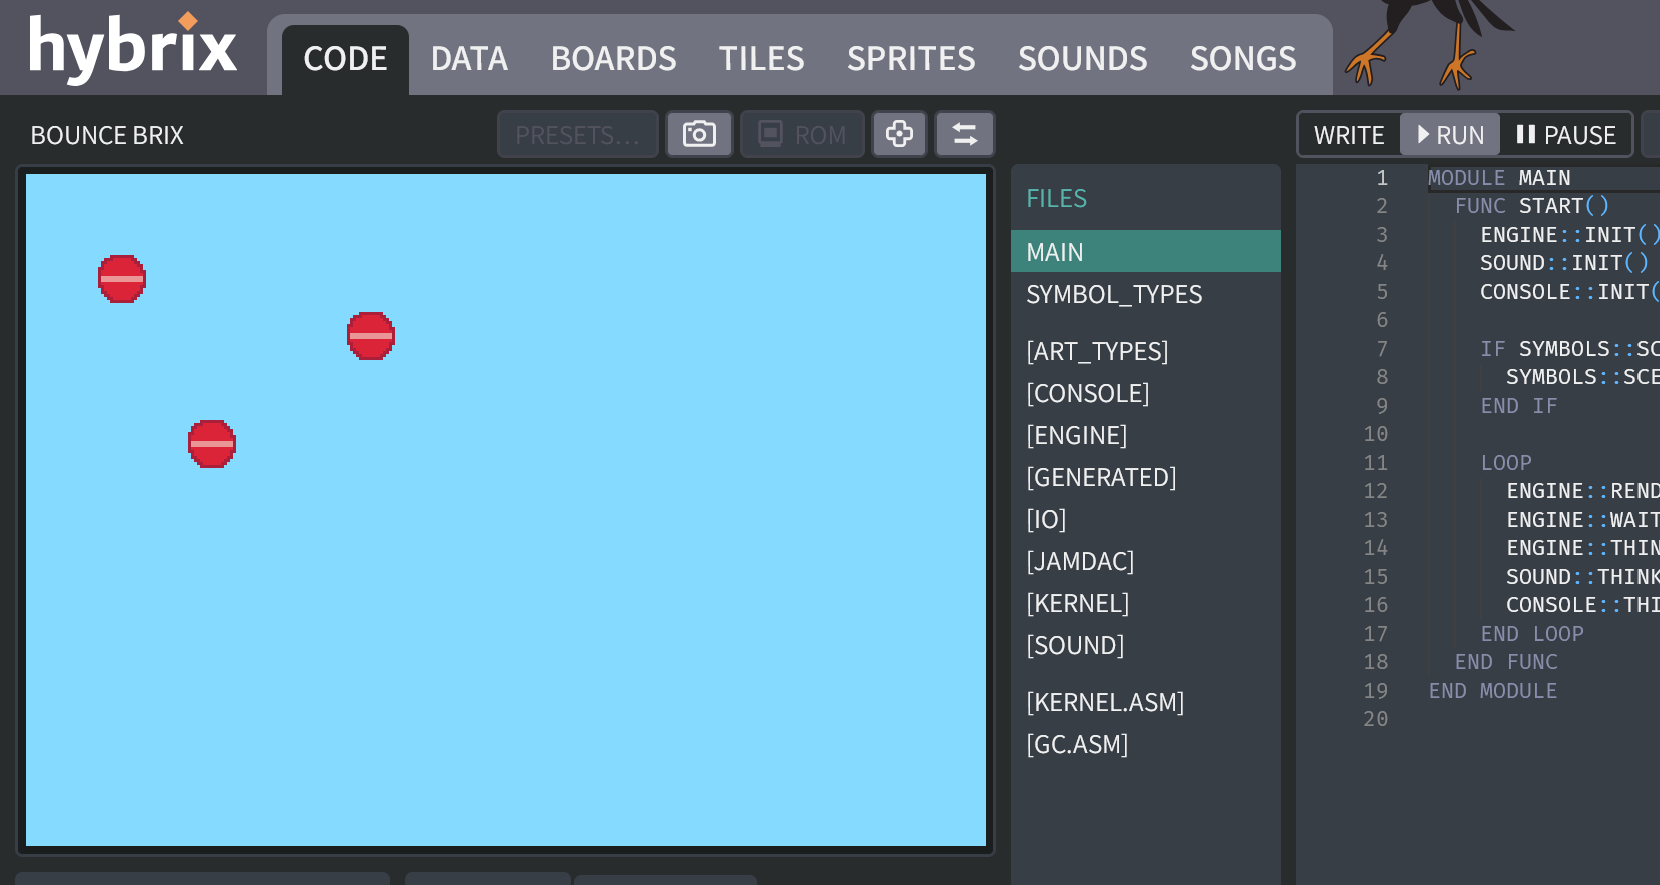
To get a little more practice, let's create a couple more actors. Redo the actions from Step 2, Step 3, and Step 4 above to make a second ball. Then make a third ball. You should end up with three red balls on your board, like this:

In the picture above, you can see that the "(S_ACTORSPOT)" symbols appear _under the "(S_SCENE)" symbol. We say they are children or child symbols of "(S_SCENE)", which is their parent symbol. These relationships will become important later. (For example, a bicycle sprite might have two wheel sprites that are child symbols; then when move the bicycle, the wheels will move with it.)
-
The name "(S_ACTOR_SPOT)" is not very descriptive. To tell your symbols apart more easily, you can give them individual names
BALL_A,BALL_B, andBALL_C. One by one, click each red ball, then type a name into this box: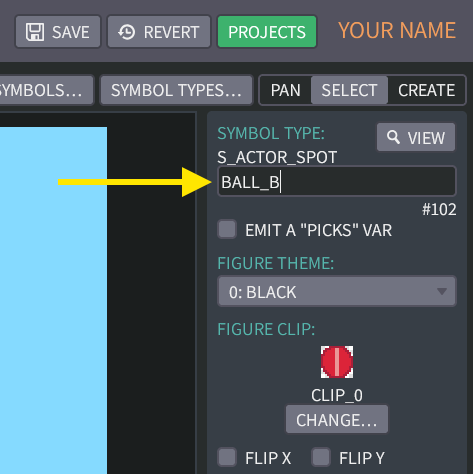
When you are finished, your SYMBOLS tab should now show the three names
BALL_A,BALL_B, andBALL_C:
-
Go to the CODE tab and click the "WRITE" button, and then the "RUN" button. You should now see three red balls together, with rolling animations:
-
As usual, if everything is working correctly, don't forget to click the "SAVE" button at the top of your screen. If you forget to save, your work may be lost when you exit the web browser.
Great job! That's all for Exercise 2. In the next exercise, we will write some code that moves these actors around on the screen.